Thursday, March 8, 2012

The Sisterhood of the Flat Hamantaschen - Cookies for Purim!


Yesterday marked the start to the Jewish holiday of Purim, and for me that's always meant Hamantachen. The jam-filled tri-cornered cookies would always make an appearance in my neighborhood bakery around this time when I was little, and I'd clamor for my mother to get them for me. They were made pretty big, the cookies were about the size of a small fist, and set out while they were still warm. The cookies themselves were buttery and tender, and the jam (or poppy seed) filling was so gooey and tasty. 

My family isn't Jewish, so we didn't celebrate the actual holiday, but I had read about the history of Purim via one of the bastions of my childhood knowledge: Highlights for Kids magazine. Basically, Haman, the advisor to King Ahasuerus, tried to knock off the all the Jews, but was thwarted by Queen Esther and her cousin Mordecai. Obviously, this is something to celebrate, and much drinking and feasting ensues. Hamantash (the singular, of course) either refers to Haman's three-cornered hat or the shape of his ears, depending on who is retelling the tale. 

I'd always wanted to make some of my own, and I figured that now was a good a time as any. I enlisted my friend Rachael, one of my favorite Jews, to help me and share in the cookie goodness. After looking through a bunch of recipes, I decided to use one from Smitten Kitchen because it used cream cheese in the dough...and that made me curious. The recipe for the dough is also super easy. 

I am...the Hamantaschen whisperer. 
Ugh, I shouldn't take photos sometimes. I'm such a creeper. 

ANYWAY. The dough only needs cream cheese and butter, one egg, sugar, orange zest, flour, and salt. It was pretty sticky, so I used a couple of pinches of flour to get it into a ball. The recipe said to let the dough hydrate and chill in the fridge at least an hour....I think we left it alone for 45 minutes before we got impatient and set to rolling it out. 


Look at those flecks of orange zest and little chunks of butter! We knew this dough was gonna be GOOD. I rolled it out to about a 1/4 inch thickness, and used a drinking glass to cut out circles. We didn't have circular cutters on hand, so unless we wanted to have pumpkin-shaped cookies, we had to improvise. 
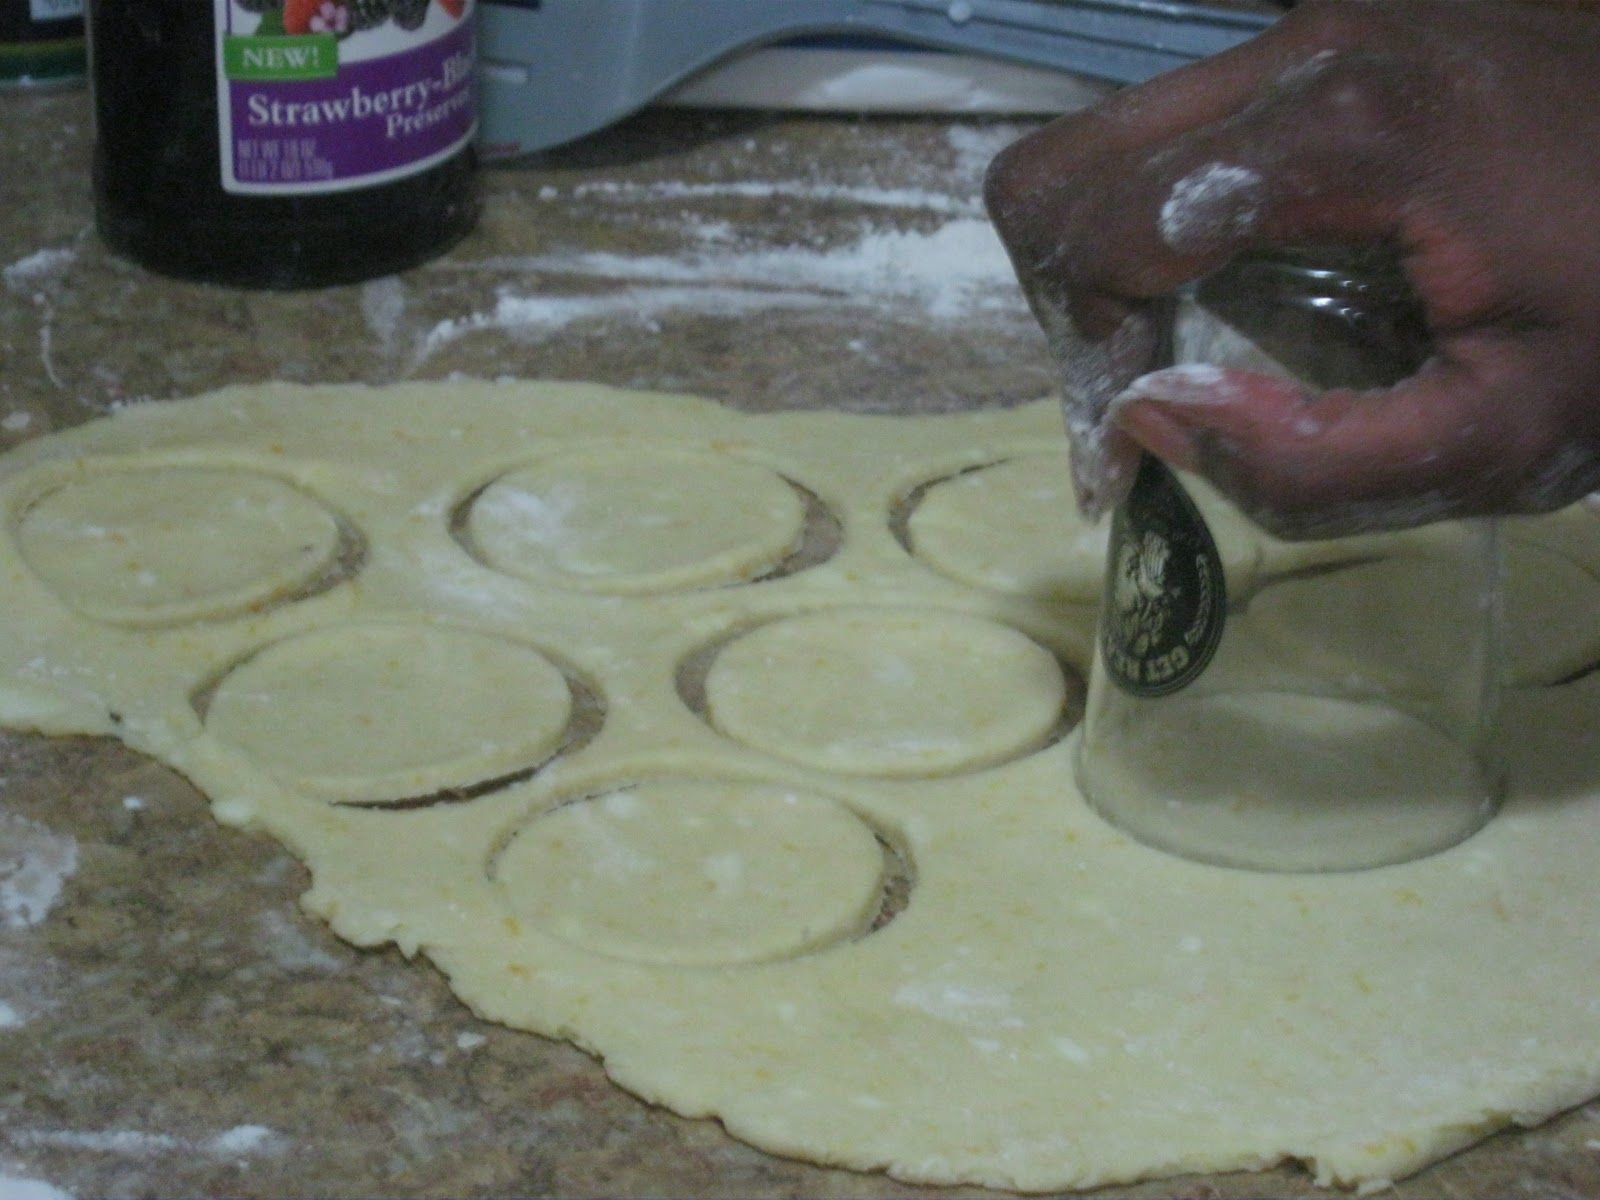

To fill our cookies, we decided to use two different types of preserves: apricot and strawberry-blackberry. For each cookie, we used a little less than a teaspoon of preserves. Place the preserves directly in the middle of the dough circle, then pinch your circle to create three points. You can use a little water or an egg wash (one beaten egg + a little water) brushed around the edge to make sure the points stick together easier.
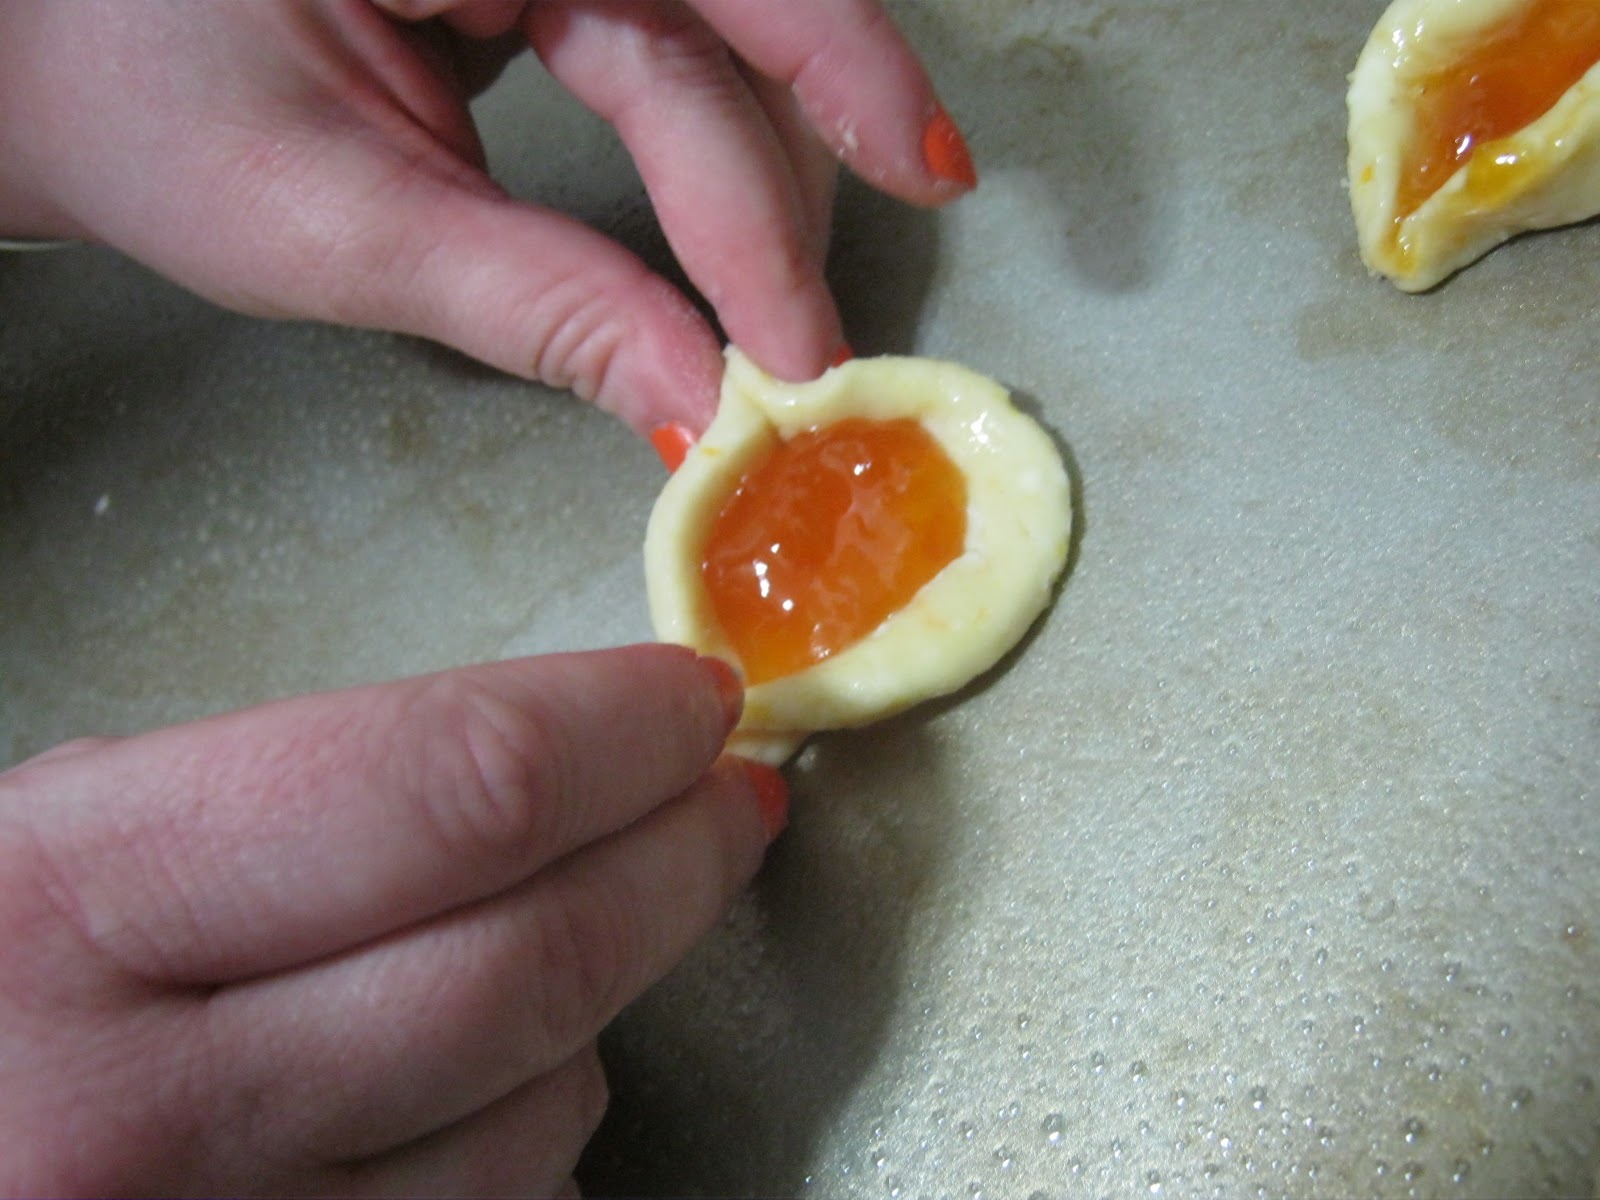
Rach is wearing orange nail polish in honor of the Syracuse Orange basketball team. She loves 'em. 
She used the apricot preserves, and I was in charge of the strawberry-blackberry. 
The cookies baked in a 350 degree oven for about 20 minutes, until the dough was golden and the preserves were bubbly.

Our first tray of hamantaschen:


Maybe we should have let that dough stay in the fridge a while longer?


Oh dear. 

But wait!


There was a cutie to be found in the bunch. 

We let them cool, and then dug in heartily. The cream cheese added a lovely tenderness to the cookies, almost like another Jewish favorite, ruglelach. I loved the inclusion of the orange zest, which gave a little zip to the dough, without overwhelming the filling. 

We had some dough left over, and after a brief sojourn in the fridge, we rolled it out for more hamantaschen....


Flat as damn pancakes. I think only one (on the far right), was the only one that came close to looking sort of normal, and not like a gaping maw. 

Whatever. With a glass of milk, they were still crazy delicious and we had a blast making them. Happy Purim, everyone!

Thursday, March 1, 2012

Supplemented Cravings: Ghetto Ramen with Shredded Chicken and Poached Egg


I am going to confess something.

Before yesterday, I had never poached an egg in my entire life. Poached eggs were something you just had in restaurants, or had cooked to rubber in greasy spoons. I had visions of beautiful eggs being lowered to their deaths in vats of steaming, murky water rank with vinegar.

Scary, baby. Just SCARY.

ANYWAY. Yesterday was one of those dreary, rain soaked days where if you're at home, you're lucky to be there. I was also lucky enough to have nothing to do all day, and when I'm bored, I get very hungry. I started to think about how long it had been since I had any delicious ramen in my life. Springy noodles, rich, meat-laden broth, and the best part: a single slow boiled/poached egg laid lovingly upon the top. Then, when you poke the surface of that soft egg, the golden yolk mixes itself with the broth and it gets all creamy and savory....then, I decided to stop thinking about it, because I was exciting myself.

Instead of lamenting about my lack of food, I decided to investigate my pantry. Behold! A pack of cheap chicken flavor ramen! Just waiting for me to class it up a bit. I knew I had some leftover brown stew chicken in the fridge that was sitting in its own juices and gravy, just waiting to be shredded. And I had plenty of eggs...if I could muster up the courage to poach one.

Now, I know y'all are looking for a step by step on this one....but Serious Eats already covered it. They have an awesome and extremely easy tutorial on poached eggs on their site. Honestly, I just followed it to the letter.

Basically, you're just simmering a raw egg in a couple of inches of water that has a dash of vinegar and a bit of salt. You want to use really fresh eggs, because the fresher they are, the more stable the whites will be. My eggs weren't super old, but not as fresh as would be ideal. I think the vinegar helped to tighten them up. Easy way to tell if your eggs are past their prime? Crack the egg into a small bowl and a look at the egg white. Does it look a little watery? If it does, you're dealing with an older egg. Fresh eggs have firm whites (or albumens), and their yolks are bright yellow and perky.

My first egg came out great except for the fact that I should have put an inch or two more water in the pan. I toasted up a slice of grainy wheat bread and decided to eat that one, then try again. I schmeared some bacon fat on the bread, and plenty of salt and pepper too. Just marvelous! The yolk was nice and runny, and the whites were so tender. The second time, I aced it. I set the poached beauty on a paper towel lined plate so it could drain and prepared the ramen according to the package's instructions.

When the noodles were ready, I poured them and the hot water into a warmed bowl, added half the seasoning packet (that stuff is SALTY), and then threw in the chicken to warm up and give off its flavor. Ever so carefully, I used a slotted spoon to take the poached egg off of the towel and laid it gently upon the broth. The sight brought a tear to my eye.

And then I remembered that I was starving, so I stabbed the egg with my fork so the yolk could run and flavor the broth. Oh, so good. Obviously not the kind that I could get at a restaurant, but who cares! This was quick, easy, and soothing to my soul.

I got to learn something new, AND I got rewarded for doing it. Talk about positive reinforcement.

Monday, February 27, 2012

A Kitchen Adventure - Kale Salad with Walnuts, Tomato, Cucumber, and Smoked Salmon


After a jaunt through Astoria's beautiful Socrates Sculpture Park with my friends Rick and Victoria one afternoon,  I'd worked up quite an appetite. Victoria was kind enough to volunteer her kitchen so I could go and get my grub on. She gave me a little tour of the pantry and fridge to let me see what I had to work with. There was a bunch of cleaned, fresh kale, some walnuts, half of an seedless cucumber, and some cherry tomatoes, which all looked great. Then, she brought out some beautiful herbed smoked salmon. Now, it was about to get real. Victoria threw an apron on me, and then joined Rick to watch me put on a show.

Creating dishes off the top of my head helps me develop my flavor palate and helps me with my recipe development skills. I was eager to make something that would be accessible, tasty, and let's not lie: impressive. I started by toasting the walnuts on the stove in a dry skillet, over medium heat until I could just smell, well, nuts. I took them right off the heat so they wouldn't burn to a crisp, and tipped them onto a cutting board where I gave them a rough chop. I put the chopped walnuts in a bowl to cool, and then sliced the cucumbers rather thin, and halved the tomatoes. I set those aside too.

Next, I finely chopped 3 cloves of garlic. I wiped out the skillet that I used to toast the walnuts, poured in 2-3 tablespoons of olive oil and set it over medium heat. When I saw the oil starting to ripple, I threw in the garlic and listened to that sexy sizzle. I took the pan over to an unlit burner and just let the garlic pop and blister in the oil. I kind of wanted it to steep in the oil and not burn, just really infuse the oil with the garlic flavor. After a a minute or two, I started putting the kale into the hot skillet, a handful at a time. Kale wilts just like spinach or collard greens, so even though you think you're crowding the pan, you're really not. I placed the burner back onto the fire, and tossed the greens around in the oil until the leaves were wilted, but not soggy. I turned off the burner and added a last hit of flavor to the garlicky greens: balsamic vinegar. Just a couple of shakes. Then, sea salt and freshly ground black pepper. I popped a kale leaf into my mouth; oh yes. The balsamic caramelized a tiny bit, and the zing of it went really well with the garlic and intense greens.

Time to plate this baby.

I took a particularly adorable "The Little Mermaid" plate and piled on a mound of kale. Then, I added some tomatoes and a couple of slices of cukes. Nestled on the side of all this goodness, a few slices of the tender smoked salmon. And for the finish, a hearty sprinkle of the chopped walnuts.

First bite: yowza. It all just worked. The kale had just enough garlic and wasn't overcooked, the raw veggies added a fresh taste and crunch,  and the toasted walnuts added warmth to the whole damn thing. The smoked salmon, well, you can add smoked salmon to almost anything and it'll taste delicious. If I had some soft crumbled chevre (goat cheese), that would have been nice too, but I wasn't sweating it, and I knew Rick and Victoria weren't either. Their plates were just as clean as mine when they finished eating.

Mission? I'd say it was accomplished...and how.


Wednesday, January 25, 2012

Bacon Cheddar Quiche with Caramelized Onions

Honestly, quiche is the best dish to take along to dinner parties and potlucks. You can serve it warm or at room temperature, it's quick to make, and you can make it as trashy or as fancy as you want! Quiche doesn't discriminate between the rich or the broke: it is delicious for all.

Anyway, for a friend's party, I wanted to make something savory and cheesy. So, a quiche with some of my favorite ingredients was obviously in order. I used the base recipe in this post, and improvised the rest. I also made 3 of these, so just adjust accordingly to make one quiche

I started by roasting a pack of Brooklyn Cured bacon (you can use whatever kind you like) in a 400 degree oven.


Just lay the strips on a foil/parchment/silpat covered baking sheet, and let it roast til it's nice and crisp. Make sure you keep an eye on it, it'll happen faster than you think.
Of course, I drained the delicious bacon fat that remained, and it'll be put to use somewhere else (biscuits and gravy, perhaps?).

While that was going on, I diced up a huge Spanish onion, and a medium red onion. It was what I had on hand, and I also love the extra sweetness that red onions have when they're caramelized.


I put the onion in a wide skillet over medium heat with two pats of butter, a swirl of olive oil, and began saute-ing. After about 5 minutes, I sprinkled a hearty pinch of sea salt to draw out a lot of the onion's natural water. Then, I turned the heat to medium low, and let the caramelization begin.

As you're using your spatula to turn the onions, you'll notice that they will start to turn translucent. Then, after about 5 minutes, they'll start to turn a little golden at the edges. I obviously don't walk away from the stove, but I don't go crazy agitating them. Once I noticed the bottom of the pan getting too dry, I stir the onions around and then I added a little bit of water to loosen the onions from the pan. I did this about every 5-10 minutes as I prepared the other ingredients.

The whole point of this is to brown all of those natural sugars in the onion and intensify their sweet flavor. This may take more or less time depending on what type of onions you're using because they all have different amounts of sugar. My batch took about 45 minutes. Once the onions were deep brown and soft, I added freshly cracked black pepper, a tiny bit of sea salt, and about two teaspoons of dried thyme, for a herbal note. Oh! I added a tablespoon of balsamic vinegar, too....because it makes the onions even more brown and delicious...and because I'm extra.

For the actual quiche bases, I beat 6 eggs with pepper, salt, and some nutmeg (freshly grated, if you please).


Then, I poured in three cups of half and half. If you're feeling more indulgent, you can totally use heavy cream.

To complete the trio of fillings, I grated about 2 and a half cups of sharp cheddar cheese. The kind I used happened to be on sale, and from Wisconsin. I hear that's where happy cows really come from.

Clockwise, from left to right: Caramelized Onions, egg and cream mixture, cheddar cheese, crispy bacon
Now, I didn't have time to make my own crusts, so I just used ones from my grocery's freezer section. I like the Pilsbury-Pet Ritz brand. 3 crusts, for three lovely quiches.

Start by putting down a layer of the caramelized onions. Just make sure they evenly cover the bottom of the crust, because you want there to be onions in every bite. Then, crumble up the bacon with your hands, and put down a layer of that.


And finally, a good handful of the cheese. Reserve about a half cup of cheese to put on top on the quiche toward the end of its baking. Give the egg mixture a final whisking, just to make sure everything is combined, and pour it into the crust.


Make sure the eggs are settled evenly around the filling, because the mixture will expand as it bakes. Bake the quiches in a 350 degree for 40 minutes...pull them out at this point and sprinkle on the remaining cheese. Return them to the oven and bake until the cheese on top gets bubbly and brown (2-3 minutes). Let it cool for 10 minutes before serving. You can eat it warm, or cold.

I am a simple girl with simple needs....bacon, caramelized onions, and cheese. Get on this quiche, folks!


Wednesday, January 18, 2012

BabyCakes's Madeleines


Instead of normal Christmas gifts, I had thought it would be nice to give my friends some tummy warming baked goods. For my friend Tana, I had decided to make her something out of the latest BabyCakes cookbook: BabyCakes Covers the Classics by Erin McKenna. We've really taken to this adorable little bakery, which happens to feature a lot of gluten-free and (GASP!) vegan delicacies. I got this cookbook a couple of months ago, and I've been itching to make something tasty from it. After many hours of page turning, I finally decided upon the adorable looking madeleines.

Madeleines are basically little plump cookie cakes. Most recipes are usually flavored with lemon or vanilla, but when I worked at Balthazar Bakery, they rotated pistachio and chocolate too. All of them were incredibly moist and delicious. And who could resist its cute scallop shell shape? Just waiting to be dunked into a hot cup of chocolate or tea.

Now, the ingredients list did look a little daunting, but you can find all of this stuff at Whole Foods or any well stocked supermarket/health food store. Personally, I used all three resources, and got everything I needed at a reasonable price.

Makes 24 Madeleines.


1/2 cup melted refined coconut oil or canola oil (I used canola oil because it's less pricey. I used a great coconut baking/cooking spray to grease the pans. You can use the canola to do that too. Refined coconut oil doesn't have a strong coconut flavor, so don't worry if you're not a fan.)
1 1/4 cups white or brown rice flour
1 cup vegan sugar
1/2 cup potato starch (NOT POTATO FLOUR)
1/4 cup arrowroot
2 1/2 tsp baking powder
1 tsp salt
1/2 tsp xanthan gum
1/4 tsp baking soda
6 tablespoons unsweetened applesauce
3 tablespoons vanilla extract
1/2 cup hot water
1/2 cup vegan powdered sugar (I couldn't find this for the life of me. So I didn't use it.)

Preheat the oven to 325 F. Brush 2 madeleine trays with coconut oil (or you can use the canola oil, or in my case, your trusty coconut oil spray) and set aside. Line a baking sheet with parchment paper.

In a medium bowl, whisk together the flour, vegan sugar, potato starch, arrowroot, baking power, salt, xanthan gum, and baking soda. Add the 1/2 cup coconut oil (or canola), applesauce, and vanilla and stir with a rubber spatula until the batter is smooth. Gradually add the hot water, stirring constantly, until incorporated.

Drop a rounded tablespoon of the batter into each mold, gently spreading it to fill the mold (make sure you fill them so they'll rise up nice and plump). Bake for 12 minutes, rotate the trays, and bake for 6 minutes more, or until the tops of the madeleines are golden brown. Remove from the oven and let stand in the trays for 15 minutes. Place the cooled madeleines on the prepared baking sheet and dust the tops with the powdered sugar.

Look at how beautiful and brown they came out! The coconut oil gives the cookie a beautiful, crunchy, buttery crust. Next time, I'll use coconut oil in the batter, too. Inside, the cookie was moist and fluffy, with a fragrant vanilla aroma.

A dozen of these were nicely packed away in a holiday box for Tana...and the other dozen? Well, those stayed right at home with me. And they were delicious dunked into a big cup of hot cocoa. Try them!

Tuesday, January 3, 2012

A New Year's Day Treat: Pioneer Woman's Blackberry Cobbler w/Honeyed Greek Yogurt


After a night filled with drunken New Year's Eve revelry, my friend Tana and I decided to spend New Year's Day in the most lazy and relaxing way possible. We slept in, made a super tasty brunch of Biscuits and Sausage Gravy, ate pita chips with huumus and black pepper Boursin, and watched a lot of television. We watched Anthony Bourdain's The Layover, which is pretty damn awesome, and The Pioneer Woman's cooking show on Food Network. Most of you know of my love and affection for all things PW, so I was excited to finally watch the show. It was just as adorable as I'd hoped it would be, and one of the recipes in particular was piquing my interest. 

The finale after their scrumptious looking pot roast sunday dinner was a buttery blackberry cobbler. It was golden and cake-y, probably closer to a buckle (made with fresh fruit and a cake batter) than a traditional cobbler. But since she made it, she can call it whatever she likes! Tana and I had bought Greek yogurt and blackberries to make little parfaits....but I figured that the fruit would be better put to use making a delectable dessert instead. 

The recipe is so easy, you could probably make this blindfolded, but you probably shouldn't. 

Preheat your oven to 350 degrees, and while that's heating up, butter a baking dish. We used a 9 inch cake pan, and that seemed to work fine. Then, take a cup of self rising flour (Now I know most of you don't have this in your kitchen...I know we didn't. Thanks to the interwebs, I found a recipe to slap together your own.) and mix it with a cup of sugar in a medium sized bowl. Whisk in a cup of milk and 1/2 a stick of melted, unsalted butter until it's all combined. Pour the batter into the baking dish, and then scatter 2 cups of blackberries all over the top. Sprinkle another 1/4 cup of sugar over the top for a little sparkle and crunch. Pop it in the oven for an hour, until it's golden and puffy.

We used raw brown sugar because it was what we had on hand the result was even more delicious. It was a deep golden brown with a chewy/crunchy crust, and I think it went well with the blackberries. 

We didn't forget the Greek yogurt though! I mixed some of it with a little bit of honey, and dolloped its creamy deliciousness right alongside the cobbler. See? HEALTHY. And just in time for the new year. 

Tuesday, December 6, 2011

Frozen Yogurt Adventure/Experiment: Lemon Ginger Fro Yo


When I was a kid, I was in love with Dannon's Lemon flavor yogurt. There was something about its tangy, yet sweet, flavor that drove me wild. My mom would buy tons of it because I'd go through it so quick. She would jokingly say that there was something unnatural about a kid liking yogurt this much, and that she'd soon have to hook me up to a yogurt IV drip. Which come to think of it...sounds kind of gross.

Damn, Mom.

Anyway, they stopped making it at some point during my grammar school years, and I was all sorts of heartbroken. Fast forward to the present....

I'm a baker for a very lovely cupcake company, and sometimes we have by-products of things left in the kitchen. We were making Hot Toddy cupcakes, and those are topped with our hand-candied lemon peels. We had a ton of lemon syrup leftover from the peels we'd candied, and I volunteered to give it a home. But what the hell would I do with it??

Then, across the sands of time, my 7 year old self reached forth, and her little hands tugged at my apron...she turned her big brown eyes up and me and said:

"Lemon yogurt, please?"

How could anyone say no to a 7 year old version of themselves?

I remembered that Alton Brown had a tasty looking recipe for Lemon Ginger Frozen Yogurt from the Good Eats episode "Good Milk Gone Bad", which was all about yogurt making and yogurt recipes. It didn't use lemon syrup....but I thought I could maybe change that. I planned to stick to the recipe, but make some changes along the way.

My cast of characters:


That brown bottle right there? That's Ginger Syrup, made by a delightful little company called Morris Kitchen. They're from Brooklyn, and their syrups are made in small batches. I was lucky enough to pick up a bottle of their Ginger Syrup and their Boiled Apple Cider Syrup at a market. I honestly haven't used them much, aside from making some kick ass ginger ale, and a really good bourbon apple cocktail. I really wanted to see what the Ginger Syrup could do for this recipe.

Instead of using regular yogurt and straining it overnight, I decided to use my favorite Greek yogurt. It's already strained! Use 32 oz of it and put it in a large bowl.

Next, zest and squeeze two lemons to get 2 tsp of zest and 3 tbsp of juice. My lemons were pretty large, so I think I got a little more than that, which was fine with me. I wanted the yogurt to be bright and full of lemony goodness. Instead of the 3/4th cup of granulated sugar, I substituted the same amount of lemon sugar syrup.


I know it looks curdle-y now...but just whisk it it, and it'll look fine and homogenized.

I started adding the ginger syrup a tablespoonful at a time. After two, I was pretty satisfied with the taste. Always taste when you're cooking or baking! It helps to develop your palate, and it lets you know if you have to add more or less of something.


Whisk it in, and then grate in your fresh ginger. The recipe also calls for crystallized ginger, but 1. I didn't have any in the house, and I didn't feel like candying my own and 2. I wanted the ginger to add a slight fresh bite, but keep the lemon as the star.


After more whisking and tasting, it was exactly where I wanted it. I put it into a clean container, covered it, and let the flavors marry overnight.

Before throwing it in the ice cream machine the next day, I gave it one more stir and taste. Mmm, yes, I was ready to roll.

I turned on my ice cream maker, and poured the yogurt mixture in.


I let it churn away for about 25 minutes. When the yogurt is thick, frozen and smooth, you're done!


Now, you're supposed to let this freeze up solid...but, we're all friends here. You know I have no patience whatsoever. So, I dished up a pretty little parfait glass for myself.


I know it's melting...but it's still lovely. I even drizzled a wee bit of ginger syrup on tops just for kicks. And the taste, oh the taste! Tart, sweet, a warm bit of heat from the ginger, but still distinctly lemony. I think my 7 year old self would be quite pleased.